Welcome back to our comprehensive guide series on the ZOYI ZT-703S, the versatile handheld oscilloscope multimeter that combines the functionalities of an oscilloscope, signal generator, and multimeter into one compact device. In this installment, we will delve into the Channel Settings of the oscilloscope function, a crucial aspect that allows you to configure and optimize your measurements.
Understanding Channel Settings
The ZT-703S features a dual-channel oscilloscope, enabling you to measure and analyze two signals simultaneously. Properly configuring the channel settings is essential for accurate and efficient measurements. Let’s break down the key components of the channel settings menu.
Accessing the Channel Settings Menu
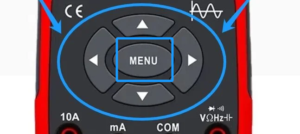
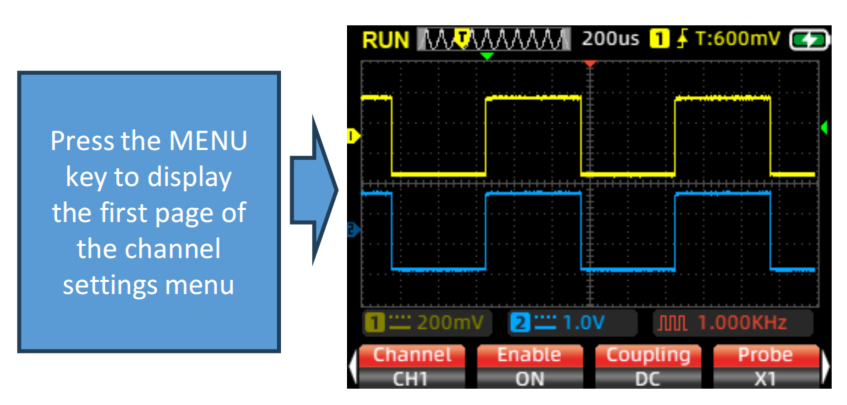
To access the Channel Settings menu, press the MENU key on the device. The first page of the menu will display the channel settings options. Here, you can configure various parameters for CH1 og CH2.

Configuring Channel Parameters
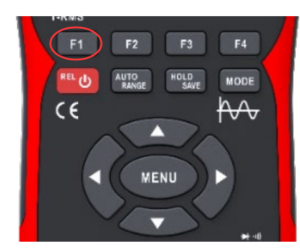
1. Switching Between Channels:
Tryk på knappen F1 key to toggle between CH1 og CH2. The selected channel will be highlighted, and you can adjust its settings accordingly.
2. Enabling/Disabling Channels:
Tryk på knappen F2 key to enable or disable the selected channel. When a channel is enabled, its waveform will be displayed on the screen. Disabling a channel will hide its waveform, which can be useful when you only need to focus on one signal.

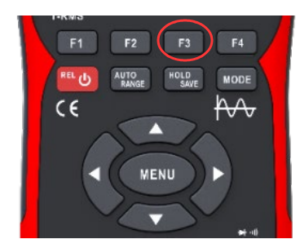
3. Coupling Mode:
Tryk på knappen F3 key to select the coupling mode for the channel. You can choose between DC (Direct Current) and AC (Alternating Current) coupling.
-
- DC Coupling: Allows both AC and DC components of the signal to pass through.
- AC Coupling: Blocks the DC component, allowing only the AC component to be displayed. This is useful when you want to focus on the AC signal without the DC offset.
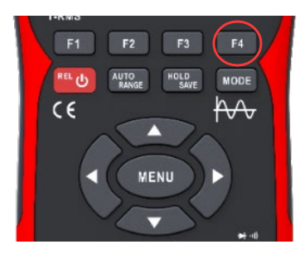
4. Probe Attenuation:
Tryk på knappen F4 key to set the probe attenuation. The ZT-703S supports two attenuation settings: X1 og X10.
-
-
- X1: No attenuation, suitable for low-voltage signals.
- X10: Attenuates the signal by a factor of 10, ideal for high-voltage signals.
Ensure that the attenuation setting on the oscilloscope matches the setting on your probe to avoid measurement errors.
-
Example Scenario: Measuring a Signal with CH1 and CH2
Imagine you are measuring a circuit with two signals: a low-voltage AC signal and a high-voltage DC signal. Here’s how you would configure the channels:
- CH1: Set to AC Coupling og X1 attenuation to measure the low-voltage AC signal.
- CH2: Set to DC Coupling og X10 attenuation to measure the high-voltage DC signal.
By properly configuring the channels, you can simultaneously monitor both signals without interference, ensuring accurate and reliable measurements.
Konklusion
Den Channel Settings feature of the ZOYI ZT-703S is a powerful tool that allows you to tailor your oscilloscope measurements to specific needs. Whether you’re working with low-voltage AC signals or high-voltage DC signals, understanding how to configure the channels will enhance your measurement accuracy and efficiency.
Stay tuned for the next part of our series, where we’ll explore the Auto Setup function, another essential feature of the ZT-703S that simplifies waveform acquisition and analysis.