A digital multimeter is an essential tool for any electrician, hobbyist, or DIY enthusiast. It is essential for monitoring the voltage of electronic circuits while troubleshooting a device or ensuring the safety of an electrical system. Here intends to make checking alternating current (AC) and direct current (DC) voltage easier with a digital multimeter.
Understanding Voltage
Voltage is the electrical pressure or driving power that drives electrons through a circuit. It can be either DC, flowing in one direction, or AC, changing direction regularly.
Confirm the status of the multimeter
Identify the type of your multimeter: Check your multimeter whether it’s an auto-range or manual range. The identification usually will be stated in your multimeter’s manual or marked somewhere on the multimeter.
For auto range multimeter, you can measure directly after selecting the corresponding gear, but for manual range, you need to measure from the largest gear down to avoid burning the meter. If you know your measuring range, you can directly hit the corresponding measuring range to measure directly.

DC Voltage Testing
DC voltage is a common feature in low-voltage applications and can be found in batteries, solar panels, and most electronic devices. Here’s how to test DC Voltage:
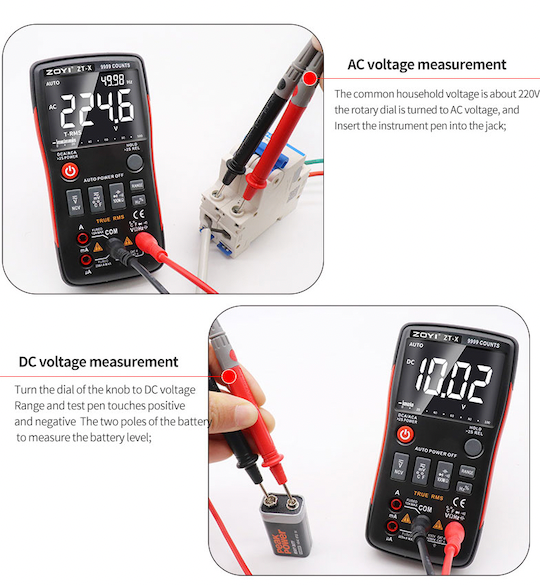
1. Set the Multimeter: Ensure that your multimeter is set to measure DC voltage, which is commonly displayed by a ‘V’ followed by a straight and dashed line.
2. Select an Appropriate Voltage Range: Set your multimeter to the highest setting that is closest to the known voltage range. If you’re unsure, start with the highest setting and gradually lower it.
3. Connect the Probes: Connect the negative (black) probe to the negative end and the positive (red) probe to the positive side.
4. Check the measurement: The voltage will be displayed as a digital readout. If the measurement is close to zero, the probes are likely reversed or adjusted incorrectly.
Note: Never attempt to measure DC voltage in a circuit driven by an alternating current supply, as this will harm your multimeter.
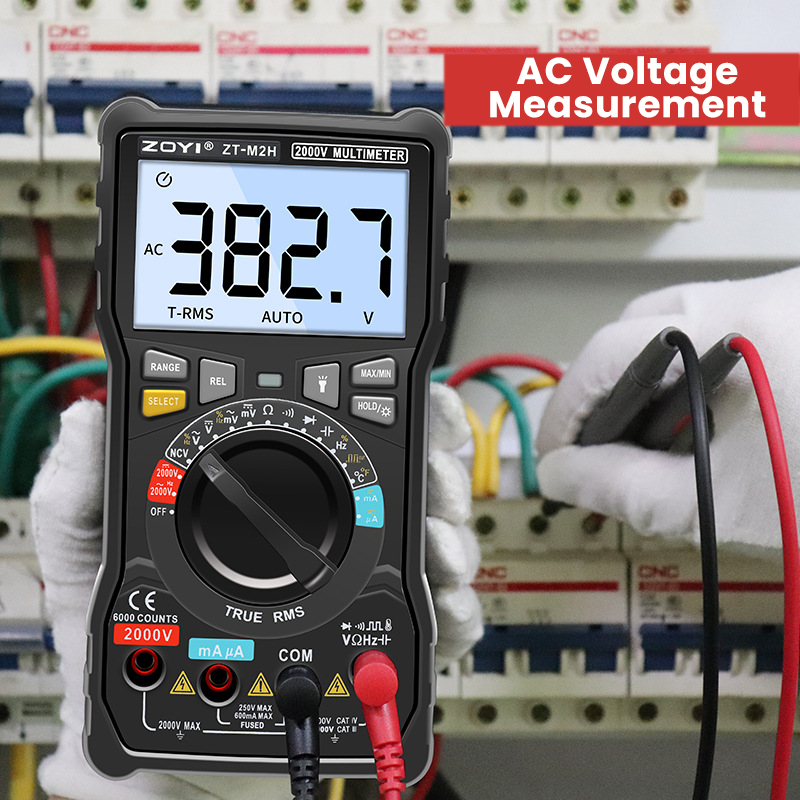
AC Voltage Testing
AC voltage can be found in residential power supplies, transformers, and some electronic gadgets. Here’s how to test AC Voltage:
1. Set the Multimeter: Set your multimeter to measure alternating current voltage, which is typically indicated by a ‘V’ with a wave line.
2. Select the Voltage Range: As with DC, choose a range that is appropriate for your measurements. Household circuits are commonly rated at 200V.
3. Connect the Probes: Polarity is irrelevant for AC voltage. Connect either probe to either end of the power supply.
4. Check the measurement: Data will appear on the display in the same way as DC voltage does. Remember that AC measurements are RMS values, which means that the real peak voltage will be higher.