A crucial part of electronic equipment is played by capacitors. But there are specific procedures that must be followed to test a capacitor’s capacitance accurately. Here is a thorough instruction for using a digital multimeter to measure capacitance safely and effectively.
Confirm the status of the multimeter
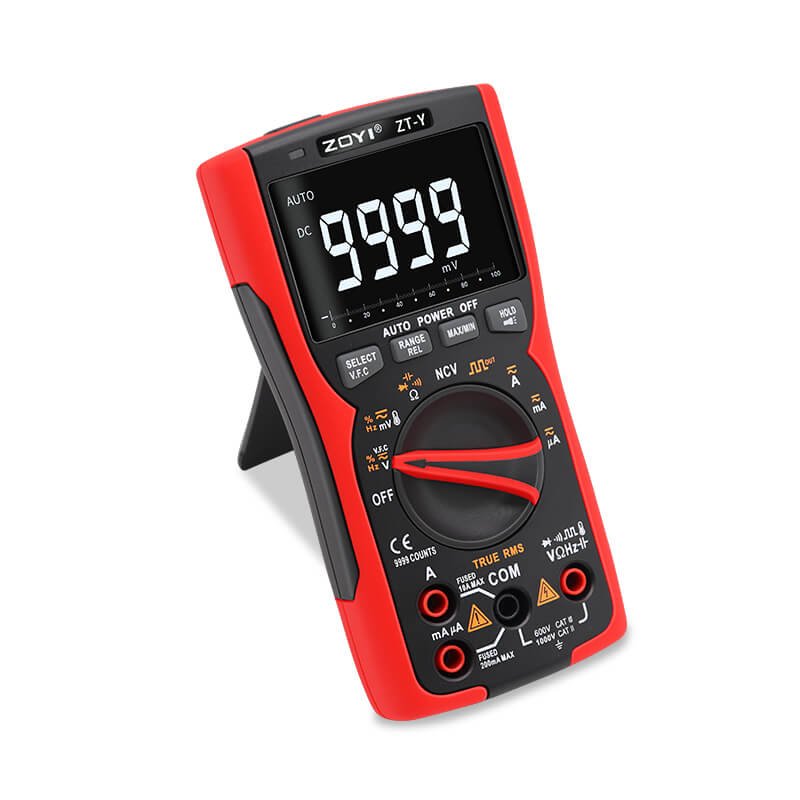
Identify the type of your multimeter: Check your multimeter whether it’s an auto-range or manual range. The identification usually will be stated in your multimeter’s manual or marked somewhere on the multimeter.
For auto range multimeter, you can measure directly after selecting the corresponding gear, but for manual range, you need to measure from the largest gear down to avoid burning the meter. If you know your measuring range, you can directly hit the corresponding measuring range to measure directly.
Step 1: Safely Discharge the Capacitor
Initially, confirm that the circuit or item has been powered off. After that, attach a 20,000-ohm, 5 watts resistor across the capacitor’s terminals and hold it in place for 5 seconds. Use your multimeter to check that the capacitor is fully discharged after that.
Step 2: Power and Capacitor Check
A digital multimeter (DMM) can be used to check if the circuit is completely off power. Ensure that your multimeter is set to measure AC voltage if the capacitor is being used in an AC circuit. Set the DMM to measure DC voltage if the device is being used in a DC circuit. Next, give the capacitor a visual inspection. Replace the capacitor if you discover leaks, cracks, bulging, or other symptoms of wear and tear.
Step 3: Modify the Multimeter Mode
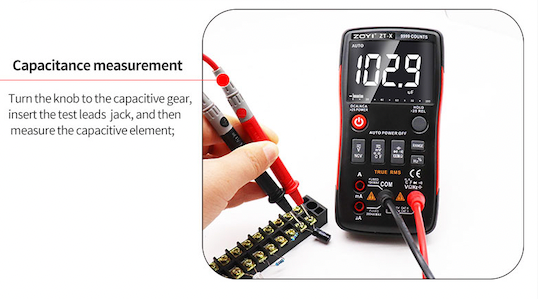
Select the Capacitance Measurement mode on the dial. This mode’s icon frequently resides next to another function on the dial. The measurement is often activated by pressing a function button in addition to the dial. Detailed instructions can be found in the user handbook for your multimeter, if necessary.

Step 4: Get the Capacitor Ready
The capacitor must be taken out of the circuit for accurate measurements. The capacitor should then be discharged as specified in step one.
Step 5: Turn on Relative Mode
Relative (REL) mode is a feature that some multimeters offer. The Relative mode can be used to completely minimize the impact of the test leads’ capacitance when measuring low capacitance values. Keep the test leads unplugged and push the REL button to switch your multimeter to the Relative mode for capacitance. The test leads’ residual capacitance value will be eliminated because of this activity.
Step 6: Connect the Test Leads
Connect the test leads to the capacitor’s terminals. For the multimeter to choose the proper range automatically, keep the test leads connected for a little while.
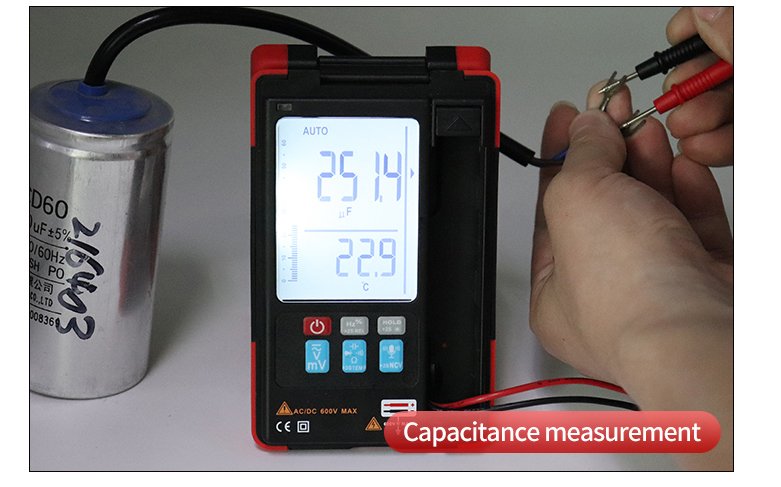
Step 7: Read the Measurements
Read the displayed measurement. The multimeter will show the value of the capacitor if the capacitance value is within the measuring range. The multimeter will show “OL” if the capacitance value exceeds the measurement range, or the capacitor is defective.
Conclusion
These instructions will help you use a digital multimeter to precisely measure a capacitor’s capacitance. But always remember that your safety comes first. Before performing any electrical measurements or testing, be sure you comprehend all safety precautions and are using the tools properly.