Bentornati alla nostra guida completa sullo ZOYI ZT-703S, il versatile oscilloscopio portatile che combina le funzionalità di un oscilloscopio, un multimetro e un generatore di segnali. In questa puntata, ci addentreremo nel Signal Generator Functions of the ZT-703S, specifically focusing on how to set the signal generator output waveform. This feature is particularly useful for generating test signals, which can be used for troubleshooting, calibration, or educational purposes.
Overview of the Signal Generator Function
The ZT-703S is equipped with a built-in signal generator that allows you to output various waveforms, including sine waves, square waves, triangle waves, half waves, full waves, and sawtooth waves. This function is accessible through the oscilloscope mode, and it provides a flexible way to generate signals with adjustable frequency, amplitude, and duty cycle.
Setting the Signal Generator Output Waveform
To set up the signal generator output waveform, follow these steps:
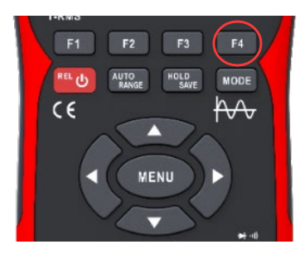
1. Access the Signal Generator Menu:
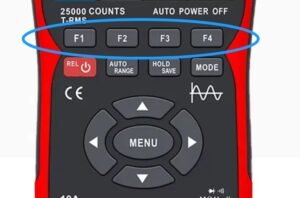
Navigate to the sixth page of the menu by pressing the MENU key and using the arrow keys to scroll. Once you’re on the sixth page, press the F4 key to enter the signal output settings. The screen will display the output signal settings window.

2. Configure the Output Parameters:
The signal settings window has four groups of settings:
- Waveform Type: Select the type of waveform you want to generate (sine, square, triangle, etc.).
- Frequenza: Adjust the frequency of the output signal.
- Ampiezza: Set the amplitude of the waveform.
- Duty Cycle: Adjust the duty cycle for waveforms like square waves.
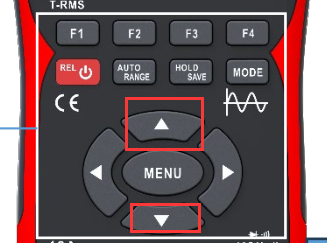
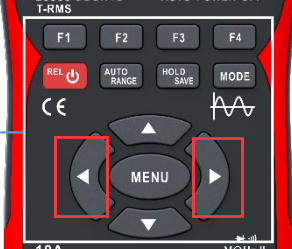
Utilizzare il tasti freccia su e giù to select the field you want to configure, and the tasti freccia sinistra e destra to adjust the parameters.
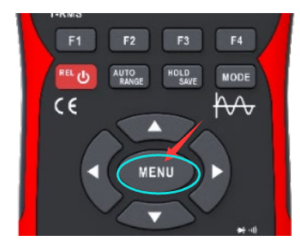
Once you’ve selected a field, press the MENU key to confirm your selection. The border color of the selected field will turn yellow, indicating that it’s ready for adjustment.
3. Confirm and Exit:
After configuring all the parameters, press the F4 key to exit the configuration window. The waveform symbol and frequency that have been set will appear in the lower right corner of the screen.

4. Connect and Measure:
Connect the oscilloscope probe to the signal output port and begin your measurement. The ZT-703S will now output the configured waveform, which you can observe on the oscilloscope display.
Important Notes
- Waveform Limitations: When the signal output waveform is set to pulse wave, sine wave, or sawtooth wave, the oscilloscope’s maximum measurement time base is limited to 100us. If you switch to a longer time base, the signal output will automatically revert to a onda quadra.
- Frequency and Duty Cycle Adjustment: You can fine-tune the frequency and duty cycle using the F1-F4 keys. Short presses will increment or decrement the values by single steps, while long presses will result in continuous changes.
Applicazioni pratiche
The signal generator function is incredibly useful for a variety of applications:
- Circuit Testing: Generate test signals to troubleshoot or validate circuit performance.
- Finalità educative: Use the signal generator to demonstrate waveform characteristics in a classroom or lab setting.
- Calibrazione: Output precise signals to calibrate other instruments or systems.
Conclusione
The ZOYI ZT-703S’s signal generator function is a powerful tool that enhances its versatility as a handheld oscilloscope. Whether you’re a professional engineer, a hobbyist, or a student, this feature provides a convenient way to generate and analyze signals on the go.
Stay tuned for the next part of our guide, where we’ll explore more advanced features of the ZT-703S.