Welcome back to our comprehensive guide on the ZOYI ZT-703S oscilloscope multimeter!
Today, we’ll dive into the Panel Function Keys and how they enhance the functionality of this versatile device. Whether you’re a seasoned engineer or a hobbyist, understanding these keys will help you unlock the full potential of the ZT-703S.
Overview of the Panel Function Keys
The ZOYI ZT-703S is designed with a user-friendly interface, and the panel function keys play a crucial role in navigating its features. These keys allow you to switch between modes, adjust settings, and perform measurements with ease. Let’s break down each key and its functionality.
1. F1-F4 Keys: Quick Access to On-Screen Functions
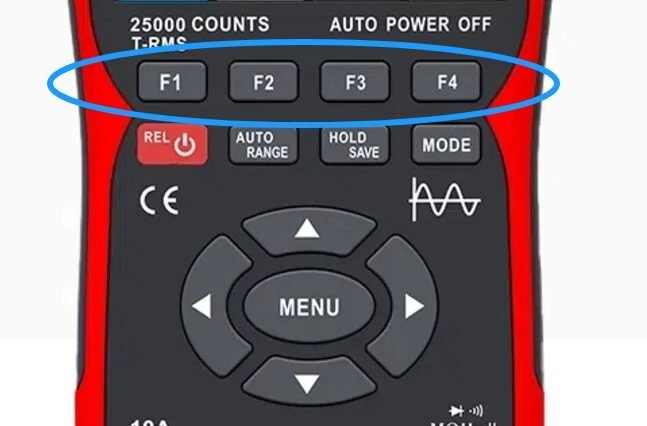
The F1-F4 keys are your gateway to the four functional menus displayed on the screen. Each key corresponds to a specific function, making it easy to select and adjust settings without navigating through multiple layers of menus.
F1: Typically used for switching channels or selecting voltage ranges.
F2: Often used for moving waveforms or adjusting vertical positions.
F3: Commonly used for triggering or cursor measurements.
F4: Usually reserved for saving data or accessing extended functions.
2. Power Button: On/Off and Relative Measurement
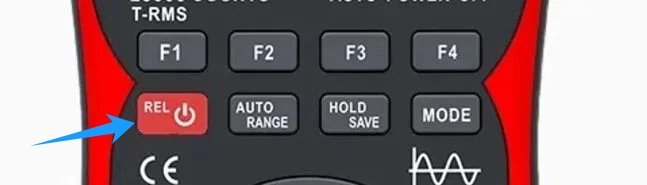
The Power Button is a multifunctional key. A long press (2 seconds) powers the device on or off. In multimeter mode, a short press activates the Relative Value (REL) measurement, which allows you to zero out the current reading for more accurate measurements.
3. AUTO RANGE Key: Automatic and Manual Range Selection
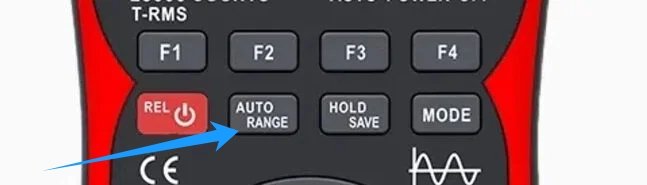
The AUTO RANGE key is a time-saver. In oscilloscope mode, a short press automatically acquires and adjusts the waveform for optimal display. In multimeter mode, it toggles between Automatic and Manual range selection, giving you control over the measurement range.
4. HOLD/SAVE Key: Data Hold and Waveform Saving
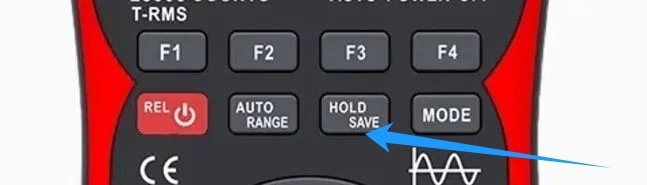
The HOLD/SAVE key is essential for capturing and storing data. In oscilloscope mode, a short press toggles between STOP and RUN modes, allowing you to freeze the waveform for analysis. A long press saves the current waveform data, which can be reviewed later.
In multimeter mode, a short press holds or cancels the current measurement, making it easier to record readings without worrying about fluctuations.
5. MODE Key: Switching Between Oscilloscope and Multimeter Modes
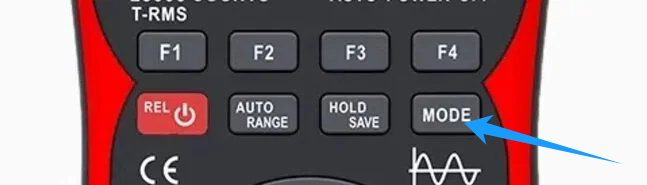
The MODE key is your gateway to switching between the oscilloscope and multimeter functions. This seamless transition allows you to perform a wide range of measurements without needing multiple devices.
6. Arrow Keys: Precision Adjustments
![]()
The Arrow Keys (up, down, left, right) are used for fine-tuning settings. Whether you’re adjusting the voltage amplitude, time base, or cursor position, these keys provide precise control. They are also used to navigate through the menu options.
7. MENU Key: Accessing System Functions

The MENU key opens up a world of system functions. Pressing it brings up the system menu, which is divided into multiple pages. You can navigate through these pages using the arrow keys to access advanced settings like channel configurations, trigger setups, and auxiliary functions.
Practical Applications of the Panel Function Keys
Understanding the panel function keys is crucial for efficient operation. Here are some practical scenarios where these keys come in handy:
- Waveform Analysis: Use the F1-F4 keys to adjust the voltage and time base, and the HOLD/SAVE key to capture and save waveforms for further analysis.
- Quick Measurements: The AUTO RANGE key simplifies measurements by automatically selecting the optimal range, while the MODE key allows you to switch between oscilloscope and multimeter functions seamlessly.
- Data Recording: The HOLD/SAVE key is perfect for recording measurements in multimeter mode, ensuring you don’t miss any critical data.
Conclusão
The ZOYI ZT-703S is a powerful tool, and its panel function keys are designed to make your measurement tasks easier and more efficient. By mastering these keys, you can unlock the full potential of this oscilloscope multimeter, whether you’re troubleshooting circuits, analyzing waveforms, or performing routine measurements.
Stay tuned for Part 3 of our guide, where we’ll explore the advanced oscilloscope functions and how to make the most of them.